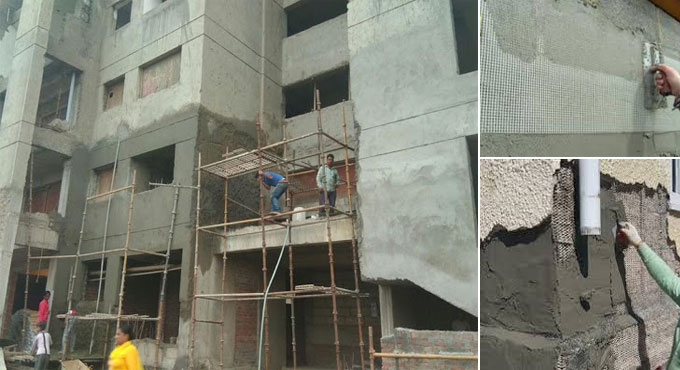
External Plastering Work Checklist - To follow in Building Construction
The external plastering work in a building project is a pretty important work because it provides the outer finish of the building. Not only that, it is the foundation for the building?s aesthetics. For these reasons, every constructor should keep in mind some basic steps in order to do it right. As such, the following checklist can be very helpful in external plastering work in building construction.
1. Clean the surface: Make sure that the external surface of the building is clean. That means the block or brick masonry and concrete surface. These should be clear of dust, oil grease, loose materials, mortar dropping, nails, wood, metal strips, etc. You should have an even, smooth surface to work on. Otherwise the bonding will not work.
2. Make scaffoldings: You need to erect a scaffolding in order to reach the entire outside surface. Conversely, you might be needing a double scaffolding as well. You have to do this without making a hole in the wall. Since in this phase you must not damage the wall in any way. However, if authorities permit, you can take support from other parts of the building.
3. Mortar and socketing: The gaps between the masonry and the beams that show on the outside needs to be filled with rich mortar. Also, you need to finish out the socketing works.
4. Chicken mesh: Then, fix a chicken mesh on the joint of RCC and masonry wall. The mesh should be 6 inches wide. Nail this mesh at 230mm intervals only.
5. Plumb measure: Use the plumb (also the line) from top to bottom to ensure the accuracy of the plastering.
The plastering here should be of a single coat of 10-12mm only. Also, you must check all the edges.
6. Handle jutting out stuff: Sometimes, a beam or a column, or other parts of construction may be budging out of the plastering. In this case, first take approval of the designer to see if you can break it off. If you can, then use a sharp chisel or hammer to break off the jutting-out portion. Also, you can use a concrete breaker in this. Do take care that it doesn?t hurt any other part of the building.
7. Check features: Run a thorough check to see if all the features of the building on the outside are showing okay.
These may include elevational features and windows and doors, etc. Your finished work should echo the architectural drawings.
8. Dampen the surface: After ensuring all masonry work has finished. Then wet the external surface. This should be done one or two days prior to plastering.
9. Prepare the mix: Sieve and wash the sand properly so that it doesn?t have silt content more than 8%. Then take 1:5 ratio and mix in the machine. Do streamline this process so that the mixed mortar can be placed within half an hour.
10. Put on first coat: Start plastering. The first coat should not be more than 10-12 mm thick. Also, there shouldn?t be any uneven surfaces. You need to wait 5 days for the first coat to cure.
11. Put on second coat: Use wires to make the first coat surface uneven before putting on the second coat. This will create better bonding. This coat should be 6-10mm thick only. Wait for 7 days for the second coat curing.

To gather more information, go through the following link onlinecivilforum.com

